
 First, we'll start with our clay! The medium we sculpt in is polymer clay. Polymer clay is essentially teensy particles of PVC suspended in a solution to make it pliable. The clay comes in a variety of colors (as you can see from the photo of my box of clay), and can be mixed in generally the same way as oil paints. Virtually any color can be created this way. The only real limitation is transparency. It's very difficult (if not impossible) to achieve a truly glassy transparency. Ice cubes, glasses of water, and the like are probably the most impossible food items to try to create from this clay.
Once we've mixed up the colors we'd like to use for a given project,
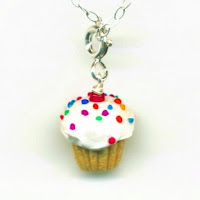 we begin sculpting. Each bit of color is a different individual piece of clay. Every single colorful sprinkle on that birthday cupcake was created one at a time, by hand. The white swirled frosting is another piece, and the vanilla cake base is yet another. We generally don't use paints in our work, so if you see color, we've mixed it from clay!
Once the clay is sculpted, we add the loop that makes it into a charm (so we can make it into jewelry), then bake it. The baking process essentially cooks off the plasticizer solution that keeps the clay pliable, and results in a very sturdy charm. (Although sometimes things can go wrong- see the post about how not to make candy corn!)
 After we've finished up our goodies, they are made into earrings, necklaces, or strung on ribbon. We put them up for sale, and
 So, that's a quick overview of the inedible jewelry process, and a close-up studio tour.
No comments:
Post a Comment